Create your first mapping
In this guide you will learn how to use Zparse mapping editor and the basics of mappings.
Create a new mapping
Go to Mappings > New mapping
Choose a name for your mapping then select "Blank mapping"
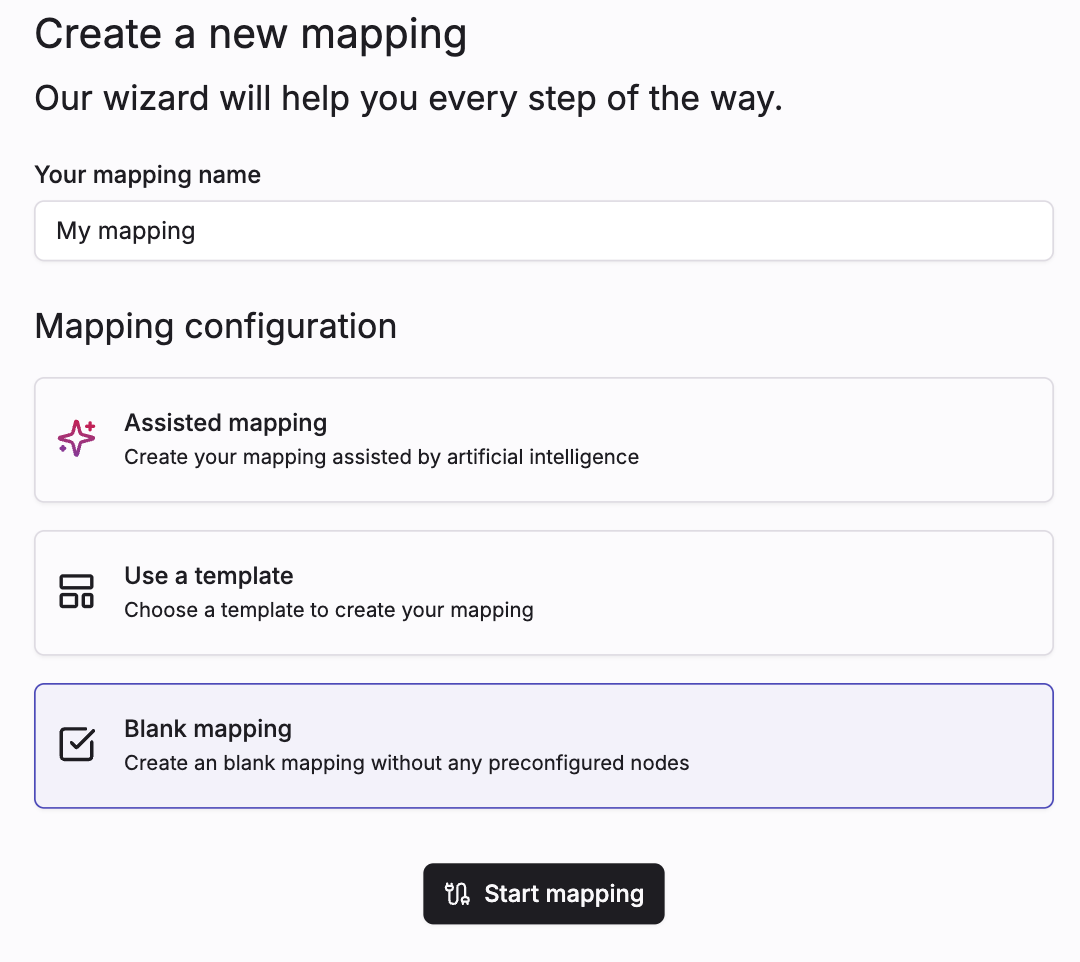
Click Start mapping to create your mapping, you will be redirected to the editor.
Mapping
Mapping is the process of transforming data from one format (e.g., Excel, XML) to another (e.g., JSON).
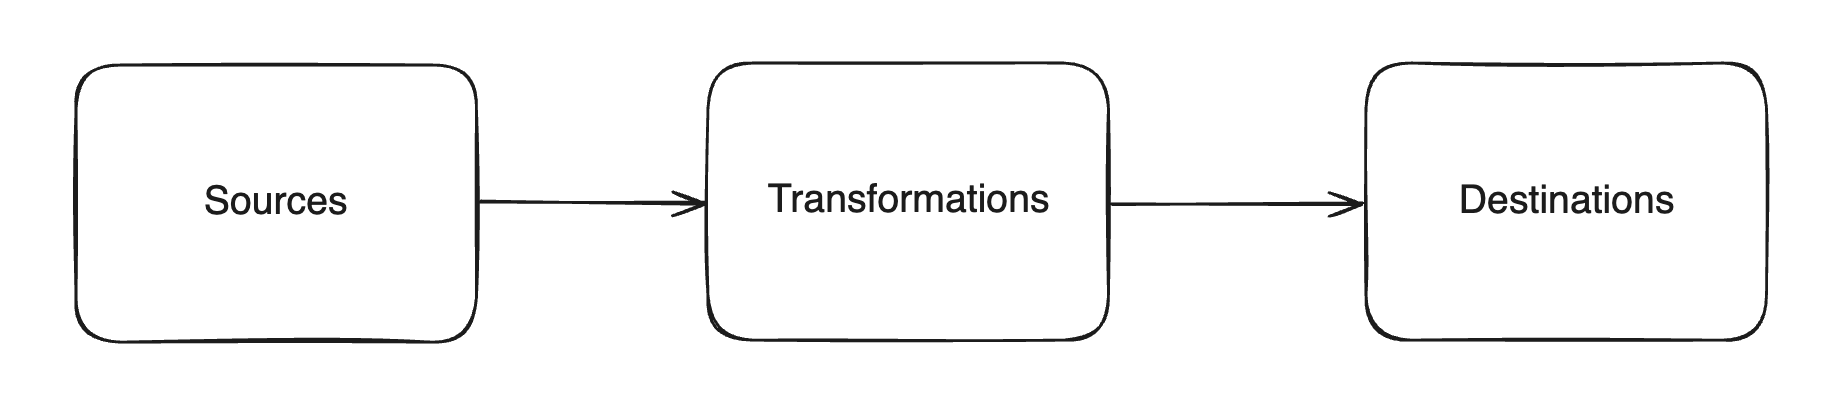
- Read data from a source
- Apply transformations
- Write data to the destination
1. Source
For this tutorial we will read data from a sample Excel file (Download sample file), to do this on the left panel pick Sources > Excel Line Reader tool and drag it to the editor.
Now you should see the tool edition panel on the right of the screen.
- Fill
Productsin the fieldSheet name - Fill
2in fieldStart line
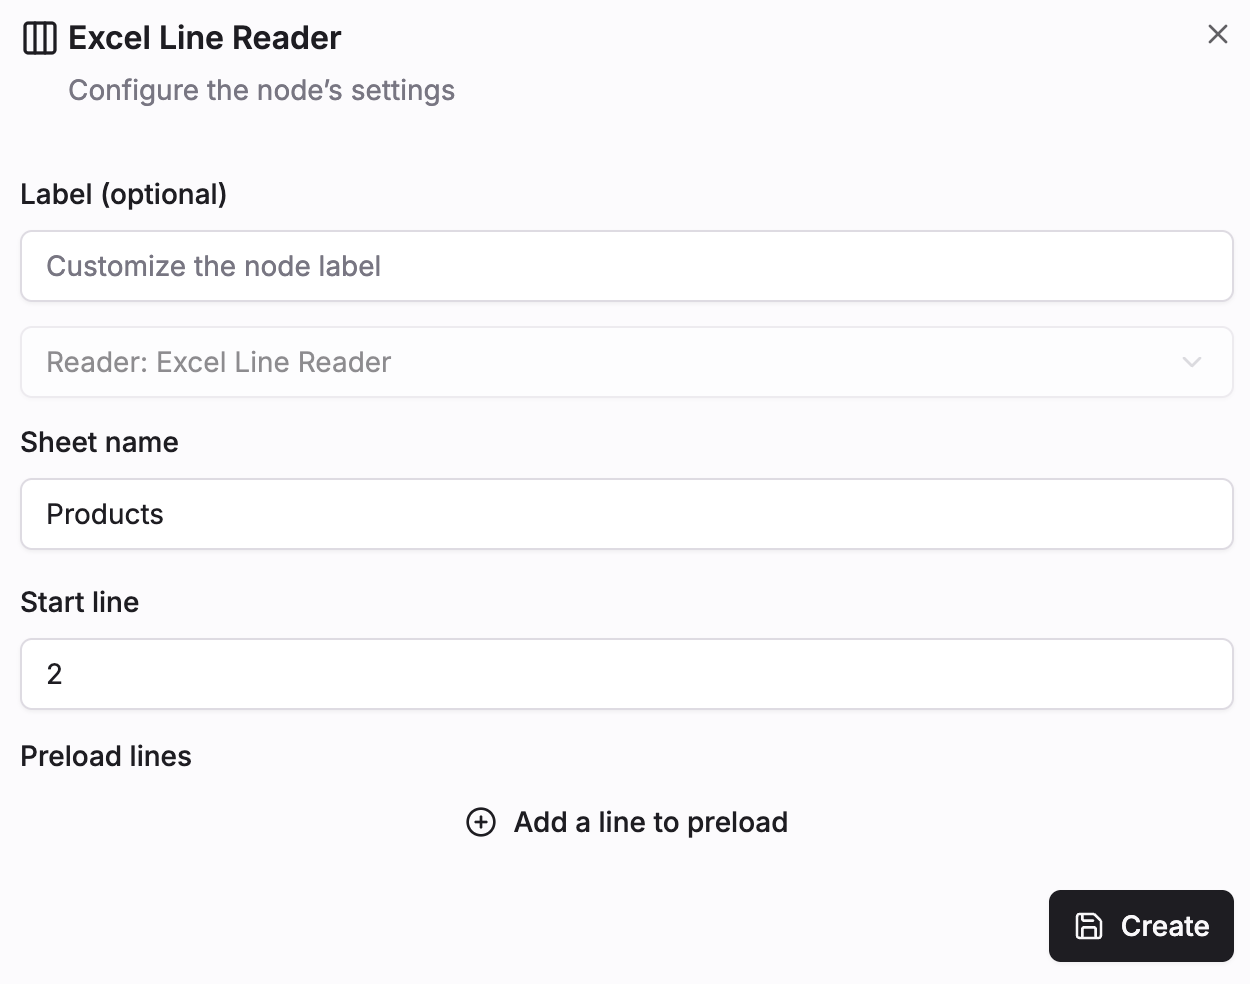
This configuration define how we will read our Excel file.
Hit Create to persist the tool.
Use your mouse wheel to zoom in/out
If you want to change the configuration of a given node you can click on the cogwheel under any node to re-open the configuration panel.
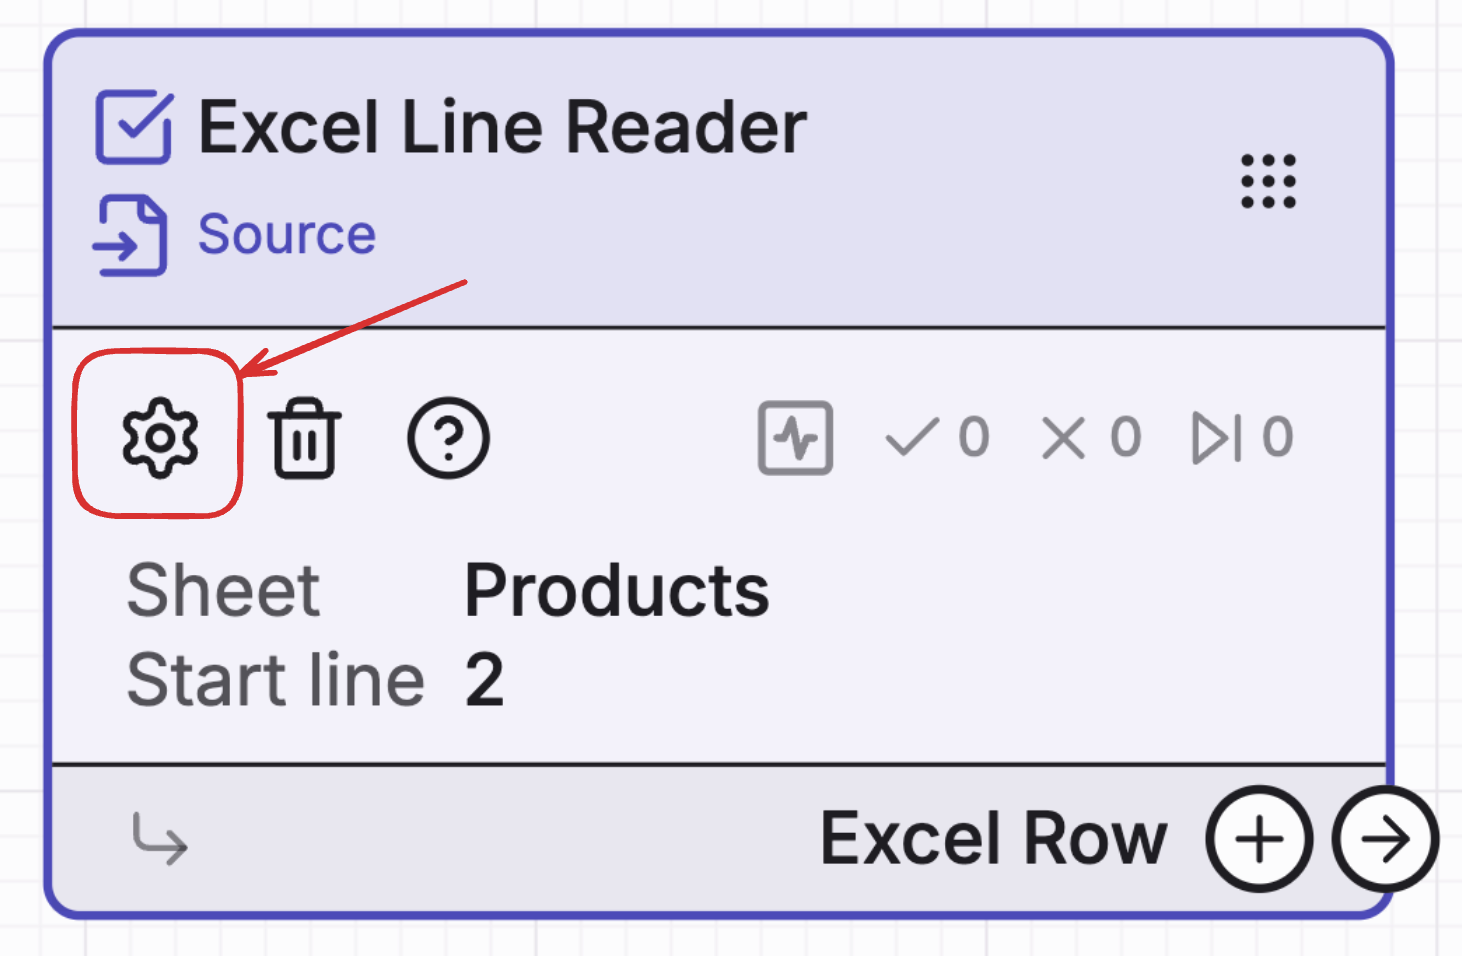
Now with this node we have the ability to read an Excel file, also we can see the output of the node is an Excel Row
2. Transformation
Our first action after getting an Excel Row will be to define which column we want to extract for the given row. Click on the + button on the node.
Select Excel: Extract values from row function.
Then, extract data from 2 columns: A (name in type String) and C (reference in type Number)

Hit Create to persist the tool.
At any moment you can change the layout of your graph, to do this you can drag and drop any node using the move FunctionSelection
Now try to put the column A extracted in uppercase using the + method on node output connector or by selecting the Uppercase function directly in the transformation panel on the left then linking both connector.
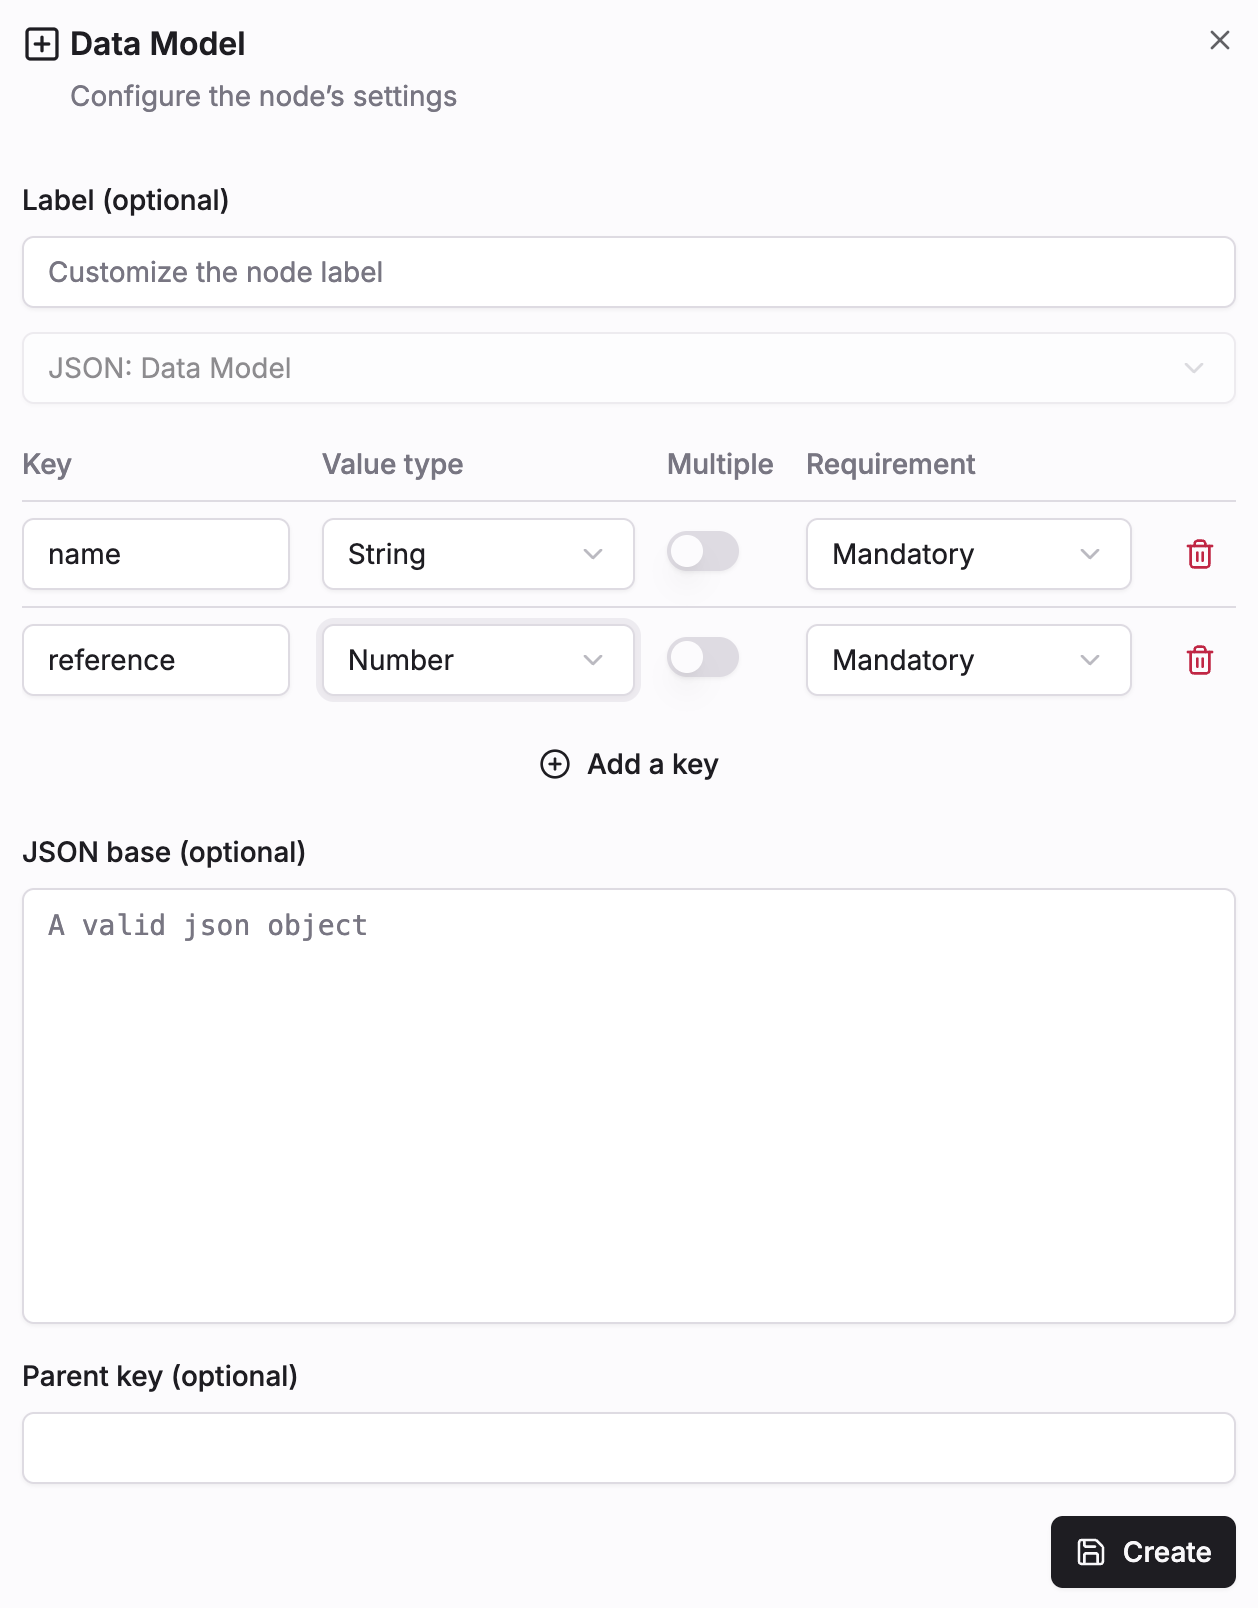
Since we want to generate a JSON file we will have to prepare a JSON object. Add a new node JSON > Data model with 2 key name as a String and gtin as a Number. Than link our previously uppercased name and the column B to the newly created node.
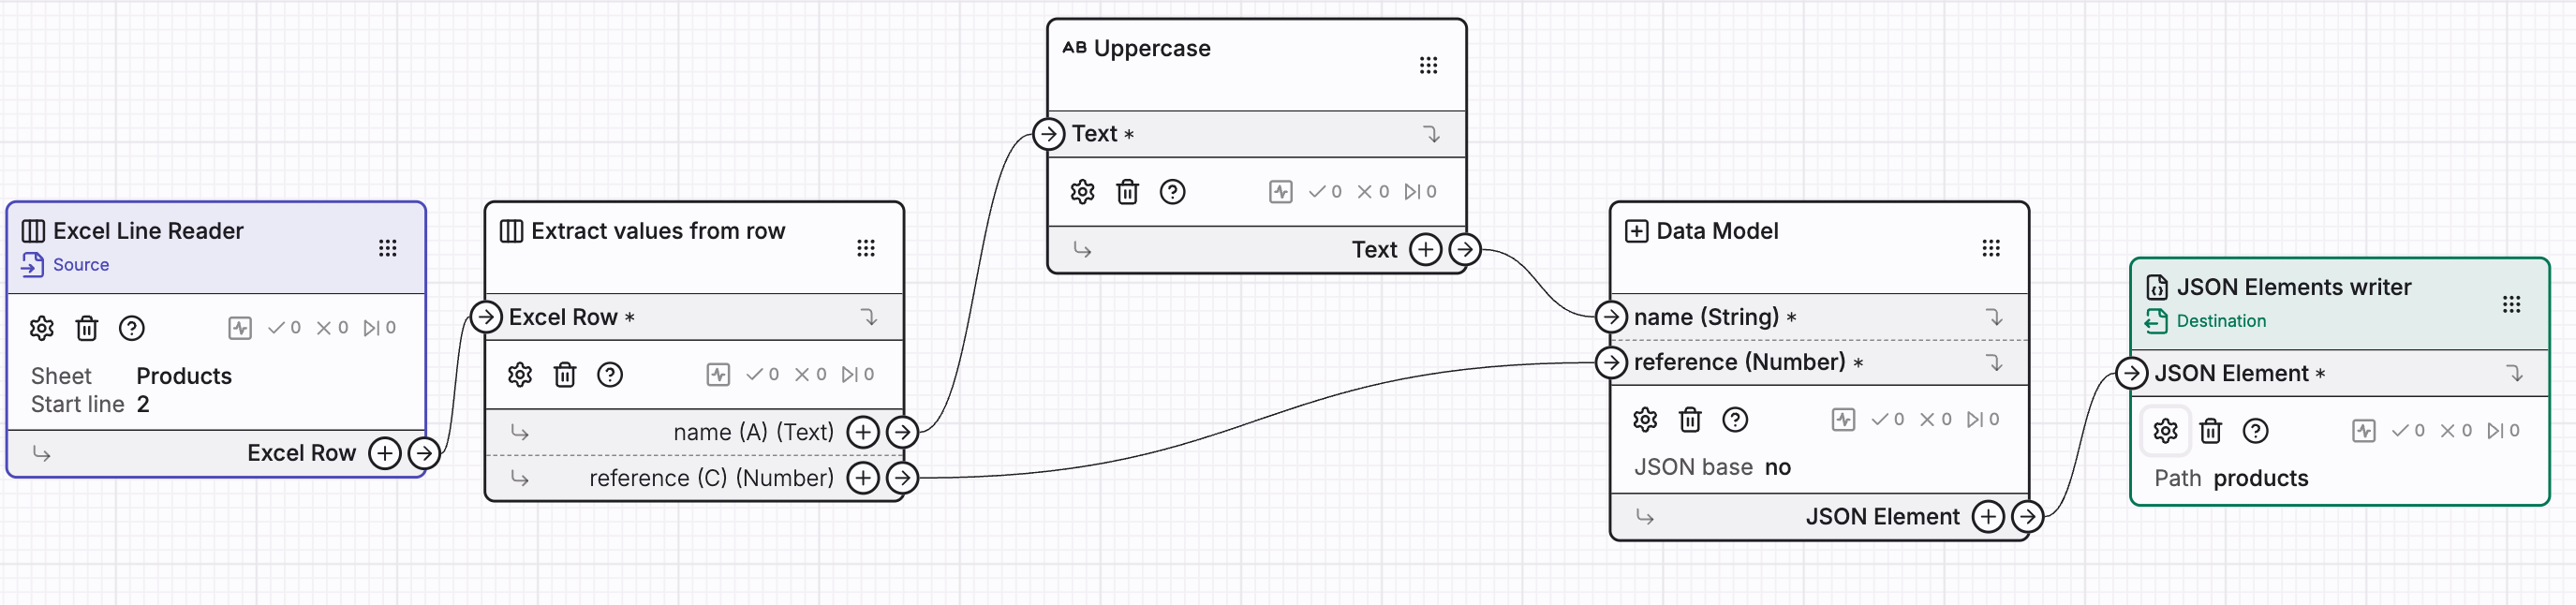
You should have something like that:
3. Destination
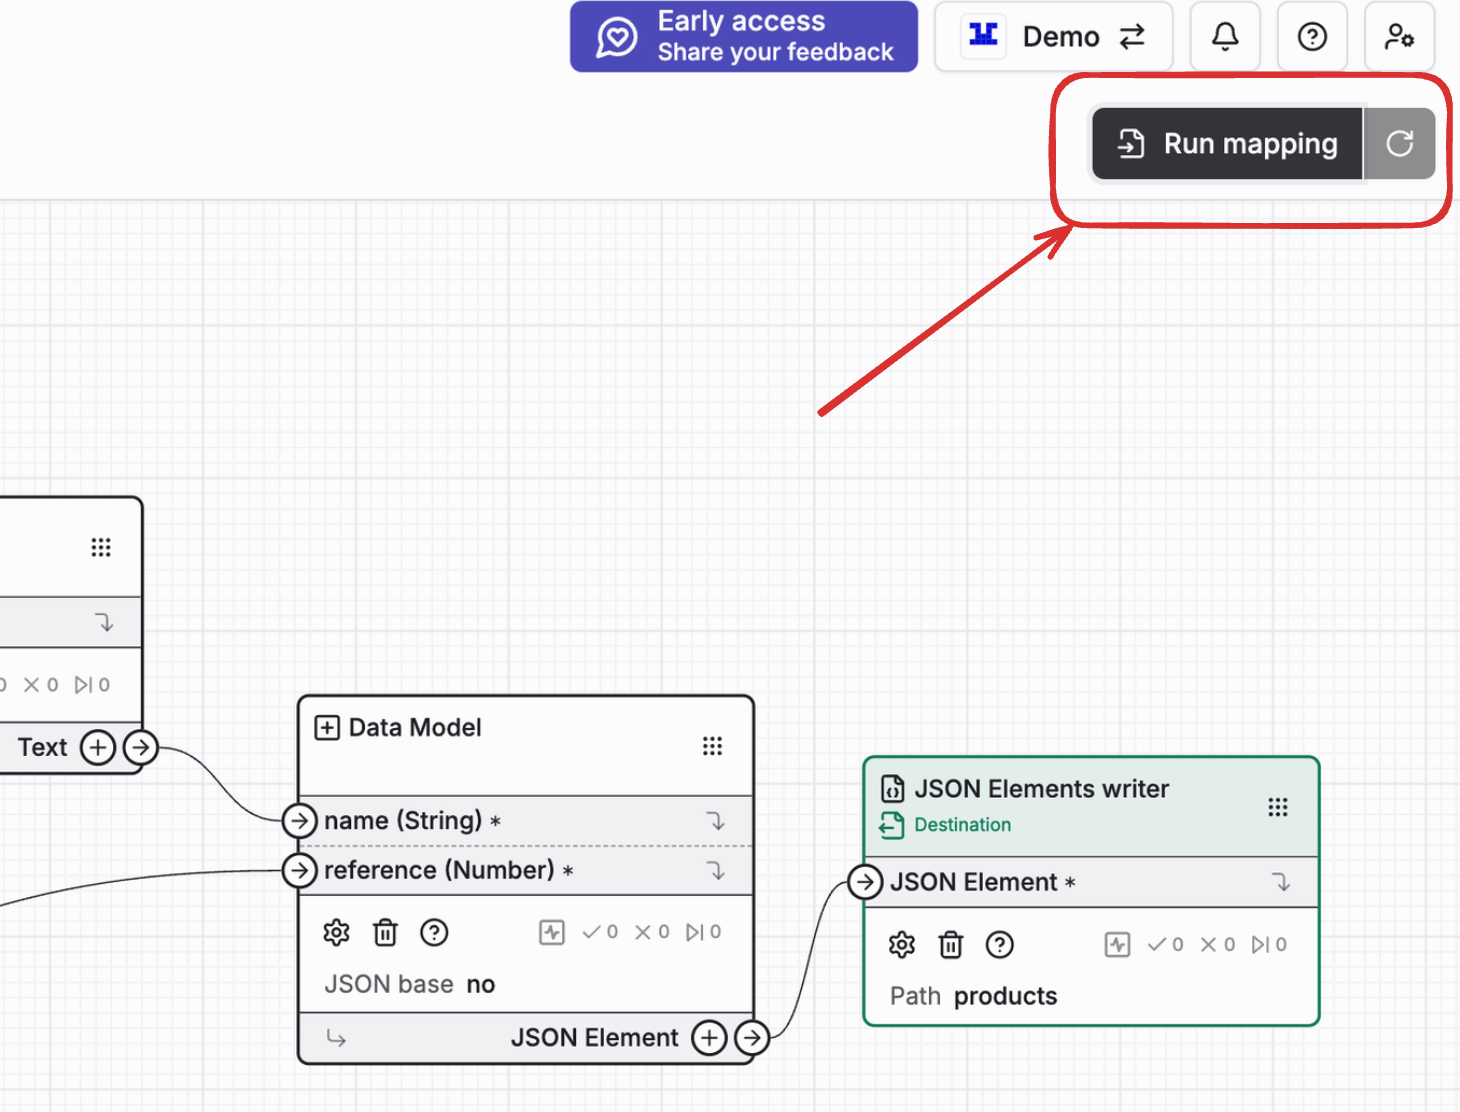
Since we want to write in JSON format, add a final node Destinations > JSON Elements writer and link the Data model node to it. Under JSON path add products (this is the array where all elements will be added).
Congratulation our mapping is completed, in the end you should have something looking like:
Test your mapping
Now we will test how our mapping execute with actual file, to do this click on Run mapping button on the top right of the editor:
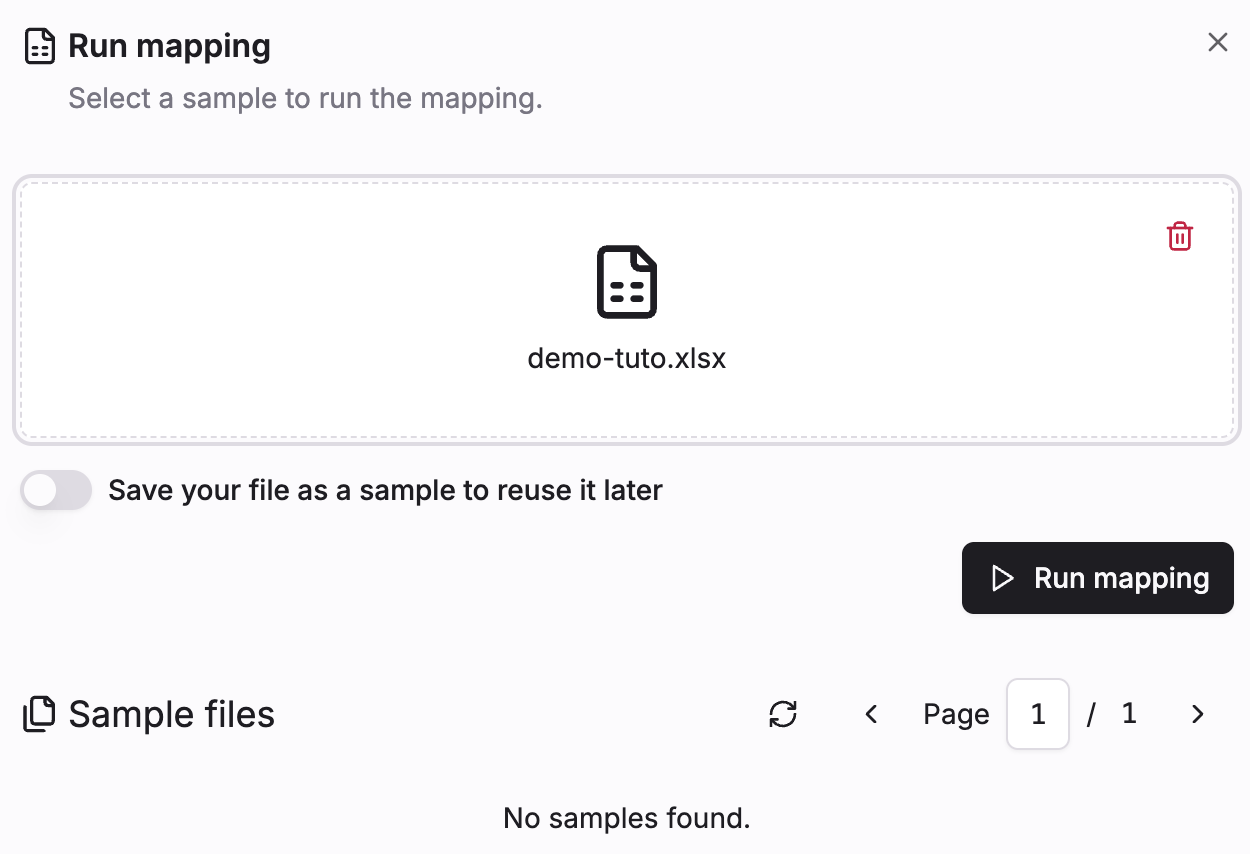
Drag and drop or select the Demo file (Download sample file) and hit Run mapping button
This will run your mapping with the given test file, now you should see the result of execution under each nodes:
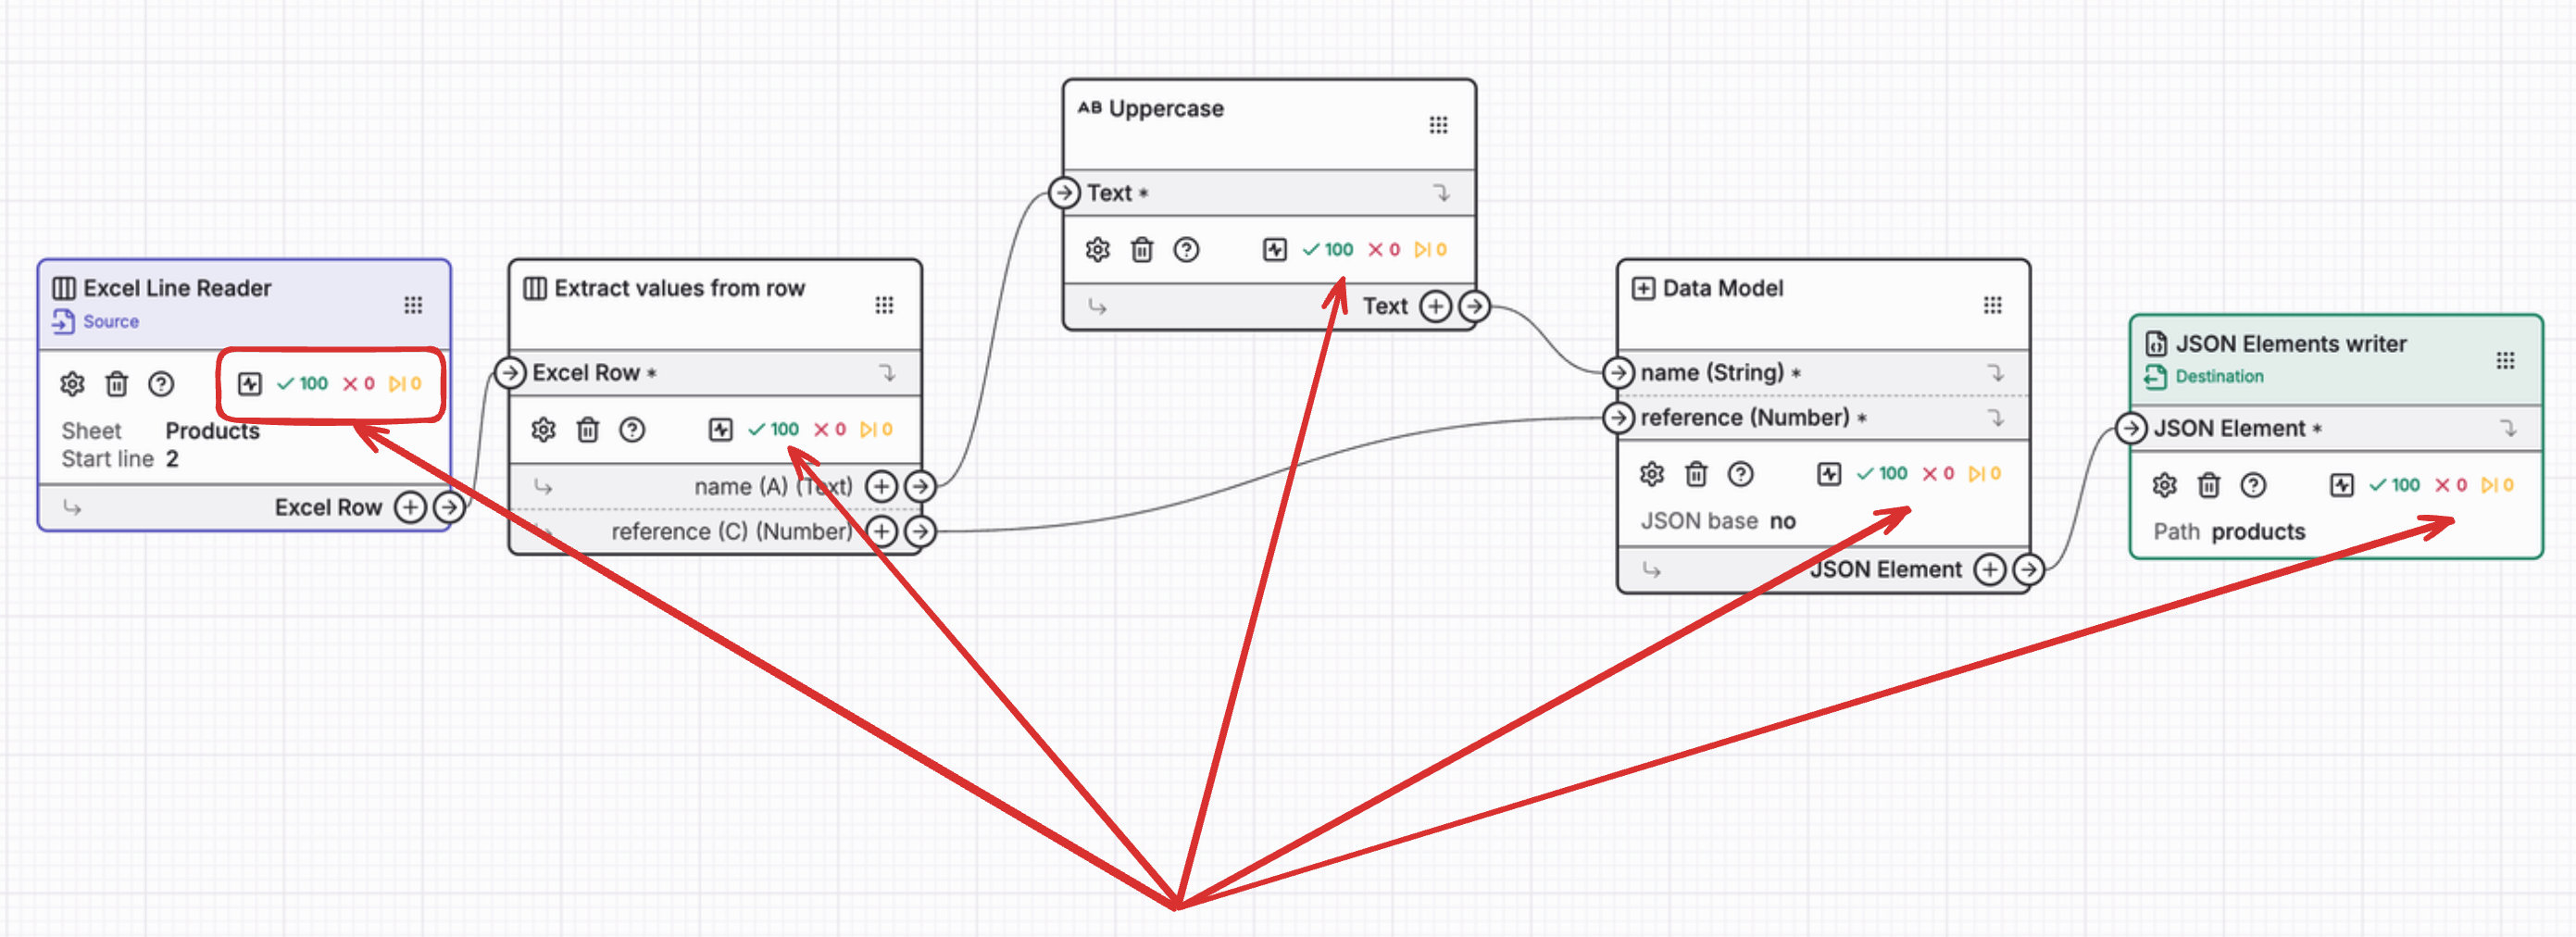
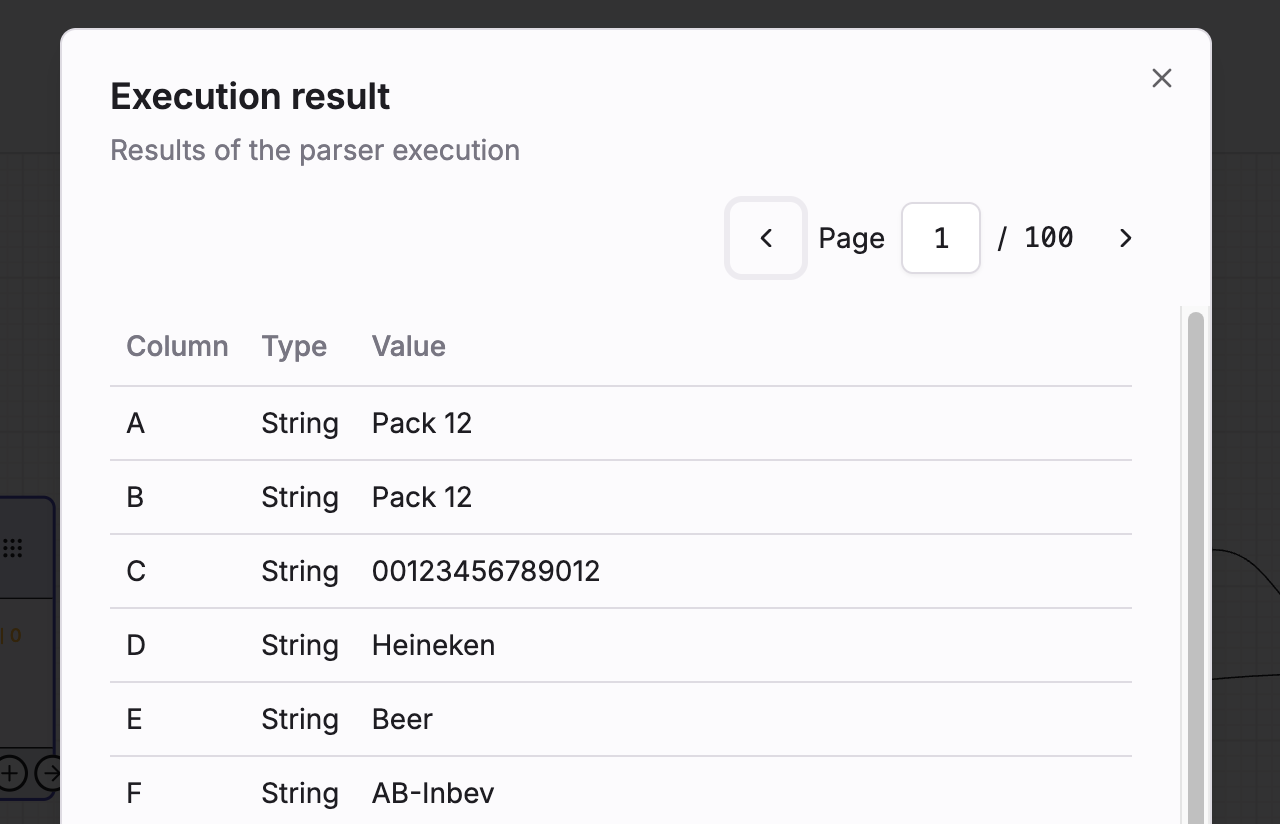
You can click on the execution summary to preview each node data. Each page correspond to a line in your Excel file.
You can run the file on the mapping at any given time to validate your mapping change are generating expected output.
Your turn :)
We made a very simple mapping to showcase editor capabilities, feel free to explore available function it and play around.
Example of addition you should be able to do:
- Extract data from column
E - Change column
Atransformation from Uppercase to lowecase